Correct configuration of Mach3 software and plugin to control the VFD
The article is about CSMIO/IP-M but the configuration applies to all CSMIO/IP controllers.
In order to fully control the VFD through the Mach3, both Mach3 and plugin must be configured in two stages:
Stage 1 ) CSMIO/IP-M relay outputs configuration
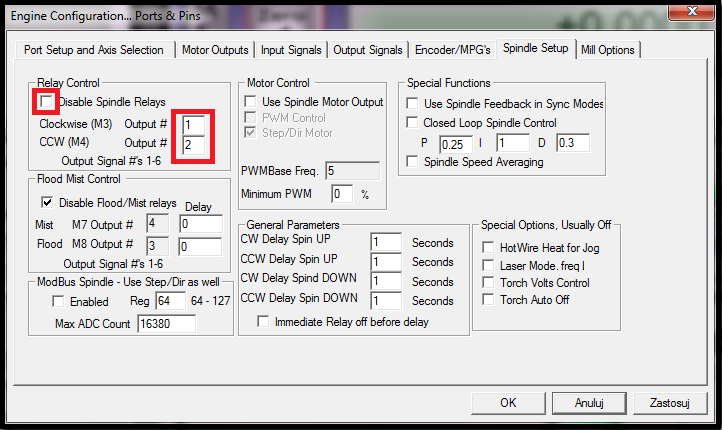
a) We start the configuration with choosing the „M3” and „M4” commands of virtual outputs: „Output#”
I chose „Output#1” and „Output#2”. For the spindles which don't have backward revs we can choose „Output#1” twice. In this case you should skip any configuration steps for „Output#2” in further stages.
Click on the picture to enlarge >>
b) Next we assign Port and Pin for virtual outputs: „Output#1” and „Output#2”.
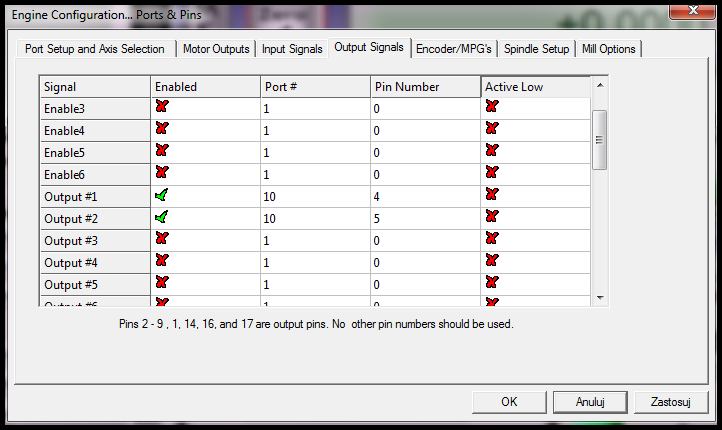
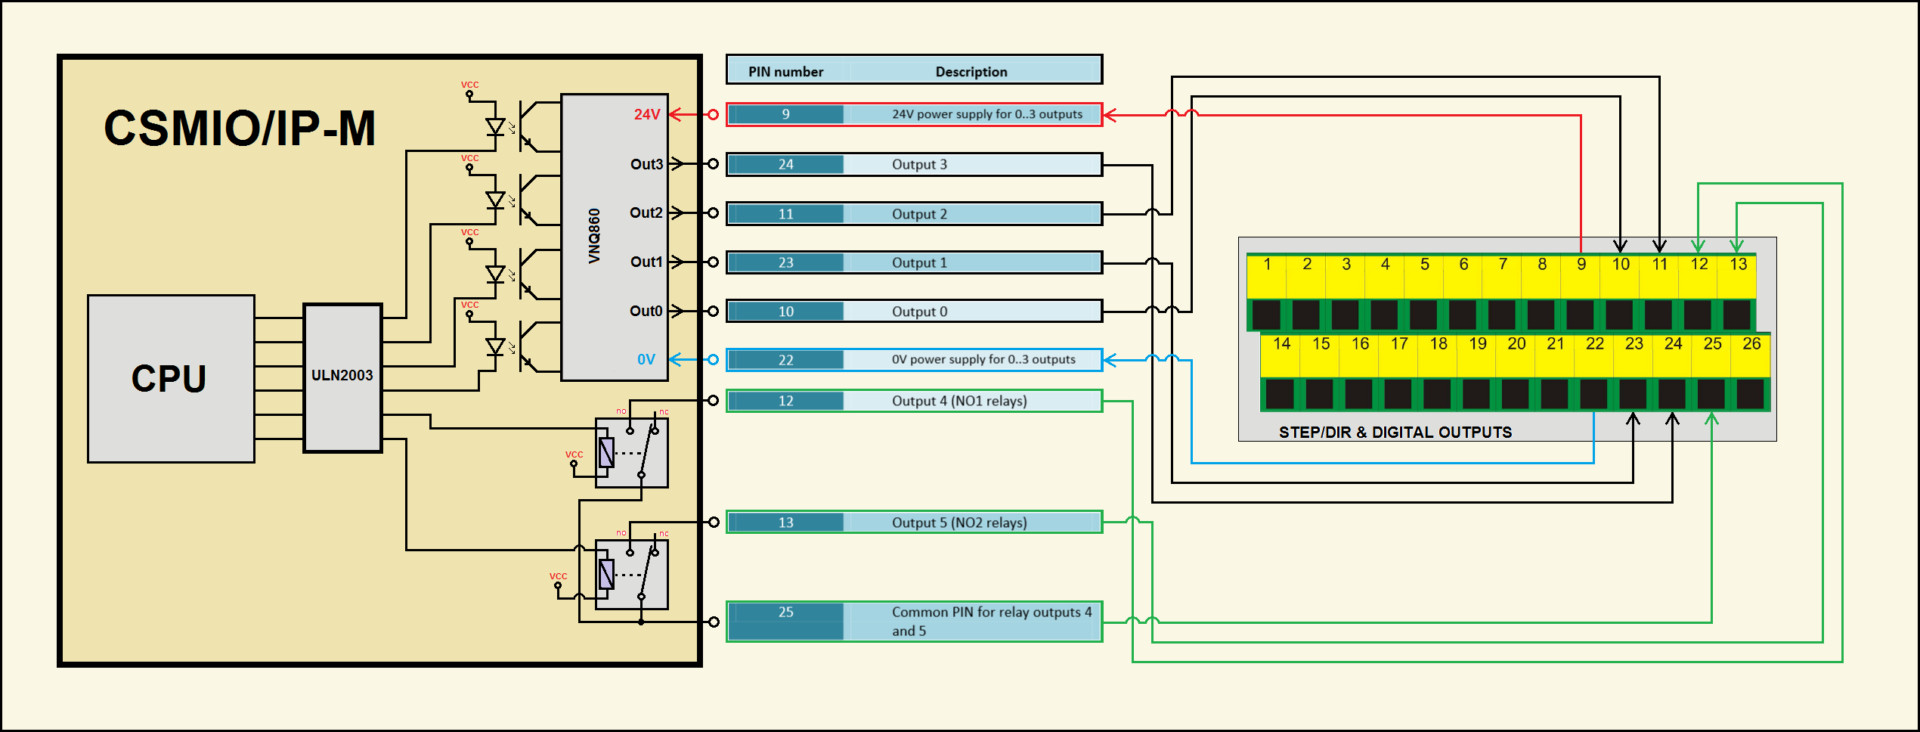
As you can see in the picture above I chose 4 and 5 „Pin”, my choice wasn't accidental - namely, these "Pins" in the CSMIO/IP-M controller are responsible for relays no.1 and no.2 (Note: for relays work the acceptable parameters are 100mA and 30V DC).
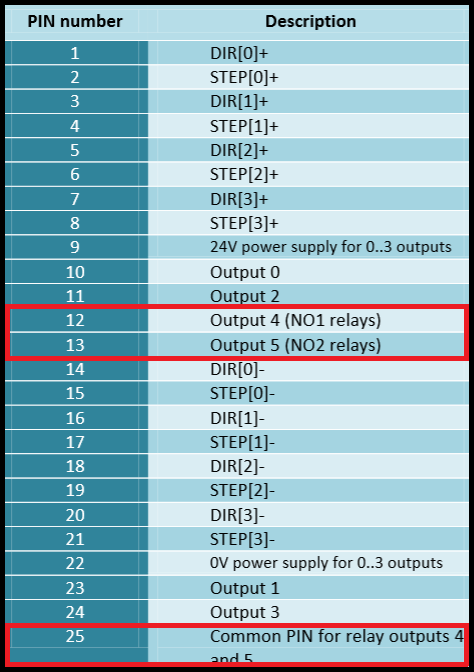
Pins no.1 and 2 of the relays were placed on 12, 13, and 25 screw terminals of the green block connector described
as „STEP & DIGITAL OUTPUTS"
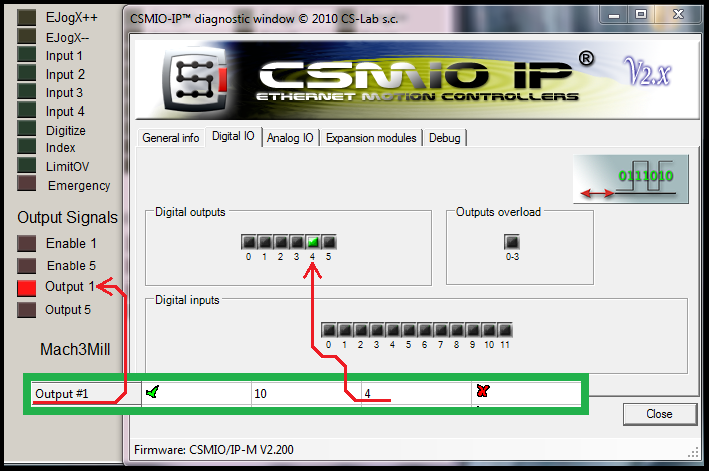
If at this moment we enter the "M3" into the MDI line and we press ENTER the no. 1 relay will close the electrical circuit between the screw terminals no. 12 and 25. On the other hand in the „PlugIn Control\CSMIO_IP plugin\Digital IO” tab and „Diganostics (Alt-7)” tab we will notice active diodes of „Output 1” (Mach3 virtual output) and „Digital outputs no.4” (digital output that controls the relay no. 1).
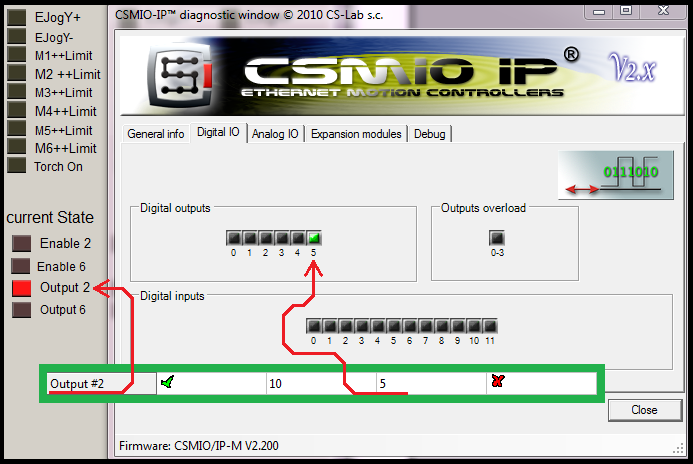
Analogously, if we enter "M4" into the MDI line and we press ENTER the relay no. 2 will close the electrical circuit between the screw terminals no. 13 and 25. In the „PlugIn Control\CSMIO_IP plugin\Digital IO” tab and „Diagnostics (Alt-7)” tab we will notice active diodes of „Output 2” (Mach3 virtual output) and „Digital outputs nr.5” (digital output that controls the relay no. 2) .
Stage 2 ) CSMIO/IP-M analog 0-10V output configuration
a) We need to make some necessary changes in the „Spindle Setup” tab at first place.
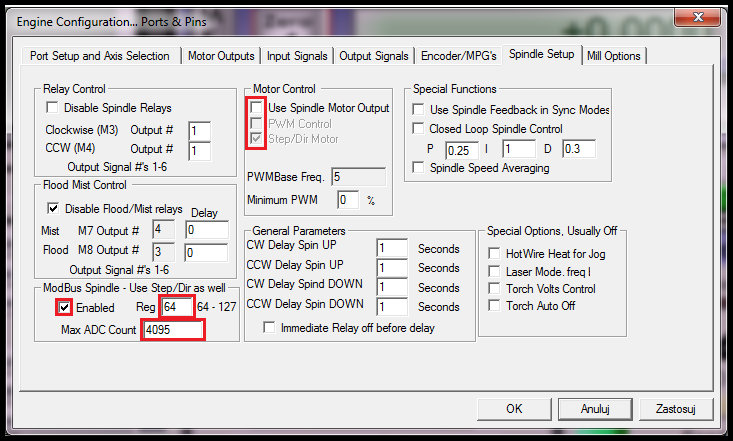
The changes must be made in the two areas as shown in the picture above. Please pay special attention on the „Motor Control” area - namely, to have the analog output working correctly, only the „Step/Dir Motor” function must be selected and gray colour.
To get this we need to do as following:
- select the „Use Spindle Motor Output” function
- select the „Step/Dir Motor” function
- deselect the „Use Spindle Motor Output” function
b) The next step is plugin configuration in the „Spindle” tab.
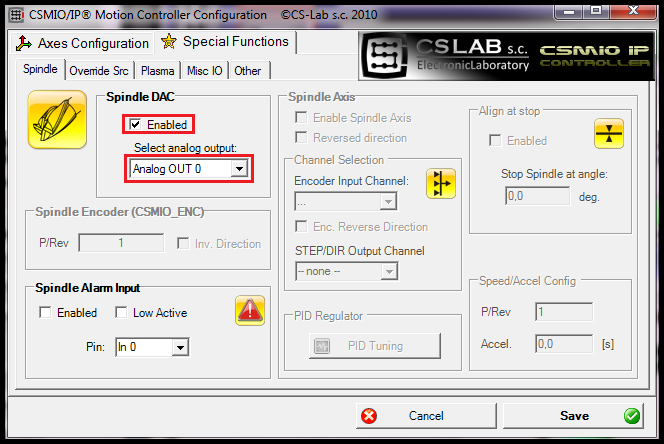
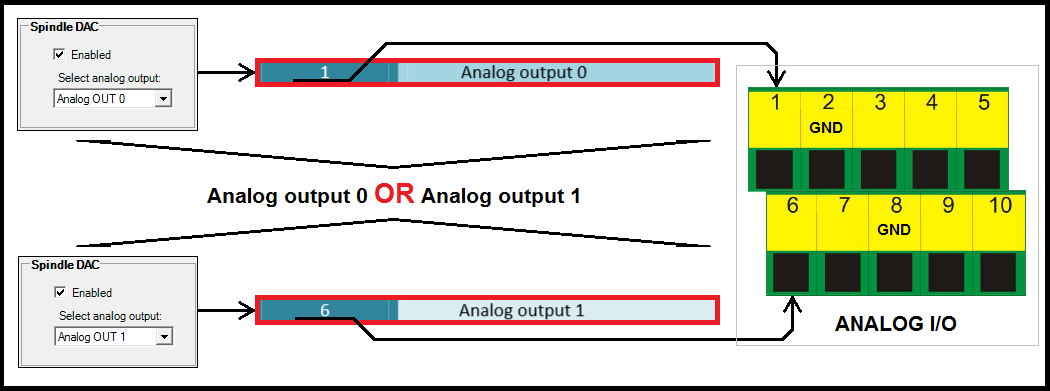
Please pay special attention on the chosen analog output number in the „Select analog output” option list as the number must be included in electrical connections.

The analog outputs pins were placed on 1 and 6 screw terminal of the green block connector described as „ANALOG I/O”.
c) We also must remember to set correct ranges of spindle speed in the „Spindle Pulleys” window.
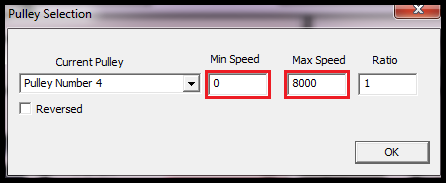
It's very important as the „Max Speed” value is responsible for voltage scaling on the analog output. As you can see in the picture, „Max Speed” value is 8000 rev/min and the analog output can maximally get 10V. In this case any further spindle speed value increase of 800 rev/min will cause voltage increase of 1V on the analog output.
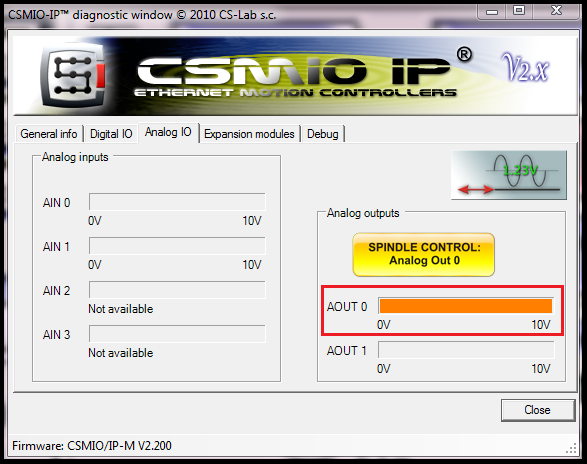
If we at this moment enter „M3 S8000” into the MDI line and we press ENTER the spindle gets the maximal speed (8000 rev/min) and in the „PlugIn Control\CSMIO_IP plugin\Analog IO” tab, „Analog outputs” area, the analog output voltage level rate will show 10V (it refers to the analog output which we had chosen earlier during plugin configuration).
At the end - schematic presentation of digital and relay outputs construction of CSMIO/IP-M controller
Click on the picture to enlarge >>
Was this article helpful?
That’s Great!
Thank you for your feedback
Sorry! We couldn't be helpful
Thank you for your feedback
Feedback sent
We appreciate your effort and will try to fix the article